I really love when I get to use GitHub pages, and I feel thankful for all the great services that GitHub offers. After brushing the dust off of my slightly neglected, GitHub page, I thought it was time for a fresh start by deploying a brand-spanking new Vue app instead this year.
As it turns out, being a little rusty, I encountered several obstacles despite following the step-by-step guides provided by others for my specific situation. Now that I have made it to the other side, I can see now that the devil was definitely in the details.
I’ve put together some helpful tips that might prevent others from experiencing the same thing by providing more in-depth information.
I aim to provide a friendly guide that you can follow, and hopefully leave with a better understanding of how it all works!
Step 1 — Have your repository setup in GitHub
This is a given, you need to get that bad boy up there if it's not already!
If you are starting from scratch, start by following the steps in GitHub’s article here:
2. After you have it set up, grab the remote URL and run the following commands to push up your locally hosted code:
git remote add origin <REMOTE_URL>
git remote -v
git push origin main
While it is possible to explore this topic in greater depth, it is not our main focus. Let's move on!
Step 2 — Set up your Vue App for deployment
If you’re not using a CNAME and hosting your Project Page on GitHub Pages, it’s served out of a “repo-name” subfolder by default like this:
https://<USERNAME>.github.io/<REPONAME>
What this means for you is that whatever folder you are linking to locally to grab your assets (CSS/Images/JS/etc), such as/assets/my-folder , will now be available at a new location in production:
/<REPONAME>/assets/my-folder
This will most certainly cause references to fail since we currently haven’t accounted for this in our code.
However, don’t fret, there is a simple solution to help you utilize this GitHub page URL structure while still maintaining the ability to preview your site locally:
Step 2a — Add Base Public Path
You have to simply prefix all links in your application with <REPONAME> to get it to work in GitHub pages. Luckily, Vite has a build option that will allow you to do just that.
Find your vite.config.ts file and add your repo name there like so:
- note that the config file should be available in your local if you used Vue’s quick start creation tool (ie. you ran
npm init vue@latestto create your project)
export default defineConfig({
  base: "/REPONAME/",
  plugins: [],
  resolve: {
    alias: [

    ]
  },
})
And really that’s all it takes to handle that! The rest of your code can be left as-is, and your links will be automatically prefixed with /REPONAME/ in production.
Sources:
Step 2b —Create a ‘gh-pages’ branch containing /dist
GitHub pages needs to find your /dist folder in order to serve your website! How shall we get it up there and recognized?
By default, the /dist folder is part of our .gitignore locally, and you won’t ever see it come up in your staged git files, and quite frankly I would love to keep it that way.
Instead, let's create a separate branch to exclusively house our /dist folder, and for GitHub pages to refer to.
In your package.json , add the following under the scripts param if it's not there already:
"scripts": {
  ...
  "build": "vite build",
  ...
}
Now, you can run these commands to push up your /dist into a new or existing gh-pages branch:
npm run build
git subtree push --prefix dist origin gh-pages
You should see the branch come up in your repository like so:
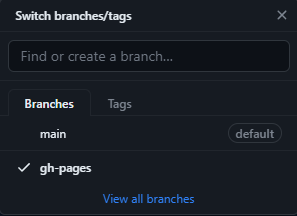
and if you take a look at the branch’s files you will find the contents of /dist:

Awesome!
Step 3— Update GitHub pages settings
Go to your repository in github.com, and go to:
- Settings -> Pages
- Under Build and Deployment, for source -> pick Deploy from a branch
- For your branch, pick gh-pages
- click save
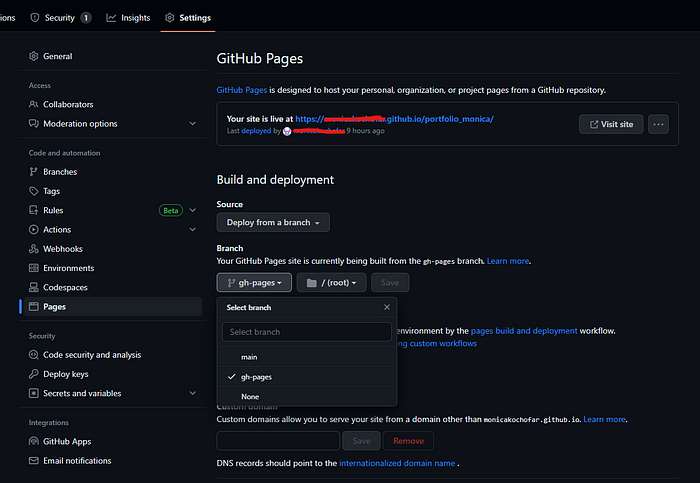
Just like that, now we have GitHub setup to listen in on the gh-pages branch to trigger deployments on every commit you push!
As an example of what it ends up looking like:

Checking my own list of gh-pages branch commits, I see checkmarks next to each one that indicates a successful deployment.
Step 4— Install the gh-pages node module
There is a tool out there that will make your life way easier for future deployments, and that is gh-pages.
Run the following command to install it:
npm install gh-pages --save-devNow in your package.json , add the following under the scripts param, both are needed!:
"scripts": {
  ...
  "predeploy": "npm run build",
  "deploy": "gh-pages -d dist",
  ...
}
Then all you need to do to deploy your app to GitHub pages is run the command:
npm run deployThis will cause the predeploy and deploy scripts defined in package.json to run. It will take your latest /dist folder push it into the gh-pages branch!
Sources:
Step 5 — View your site
Going back to your GitHub Repository Settings -> Pages, you should see a URL at the top by now indicating your website is live at that location.
Congratulations you did it!
Thanks for reading! Feel free to drop a comment if this worked for you or if you have any questions, I’d love to improve the quality of this guide to help others. While I’m still new to medium and the expectations that come with a good article, I’d love to continue to learn alongside other bloggers! Drop a follow and I’ll be happy to follow back. Cheers
Credit:
Photo by Krišjānis Kazaks on Unsplash